How to Change the Default Size of an Element
Step-by-Step Instructions
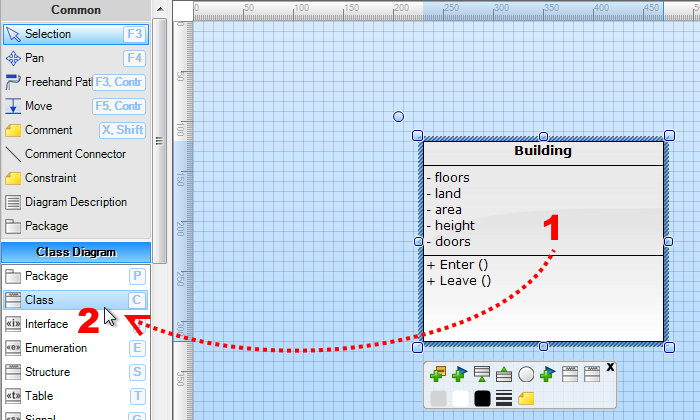
1. Select Your Template Element:
Start by dragging an element from the toolbox to your diagram canvas. Adjust this element to your desired size. This will be the size you set as the default for future elements.
2. Access the Toolbox Customization:
With your resized element still selected, navigate to the toolbox. Right-click on the tool corresponding to the type of element you've adjusted. Alternatively, you can right-click on any other tool in the toolbox if you wish to set the default size of the selected element for a different type of tool.
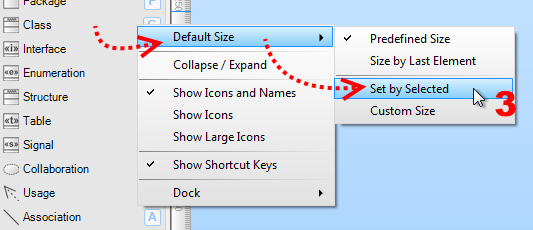
3. Set the Default Size:
In the context menu that appears after right-clicking, select 'Default Size' followed by 'Set by Selected'. This action sets the chosen size as the default for new elements of this type.
4. Implementation:
From now on, any new element of the chosen type (for example, UML classes) that you add to your diagram using drag and drop will appear with the new default size.
With these simple steps, you can customize your workflow in Software Ideas Modeler, making diagram creation faster and more consistent. Adjust once, and enjoy the efficiency of default settings in all your future projects.
Remember, you can repeat these steps for different types of elements to tailor your entire diagramming environment to your needs.
New Comment