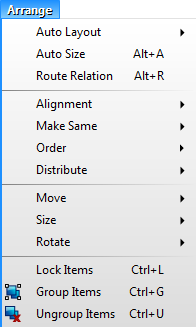
Arrange Menu
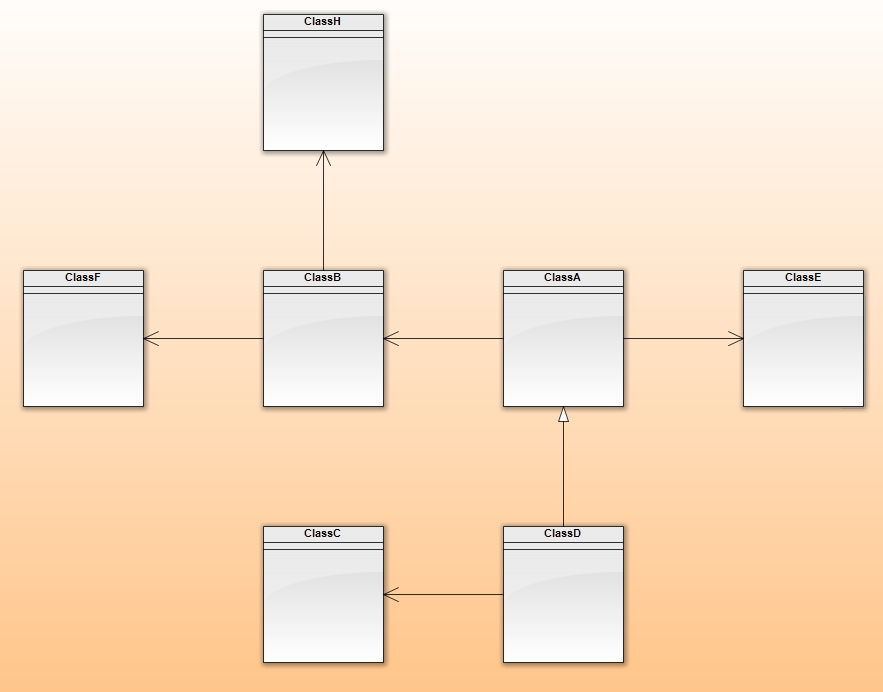
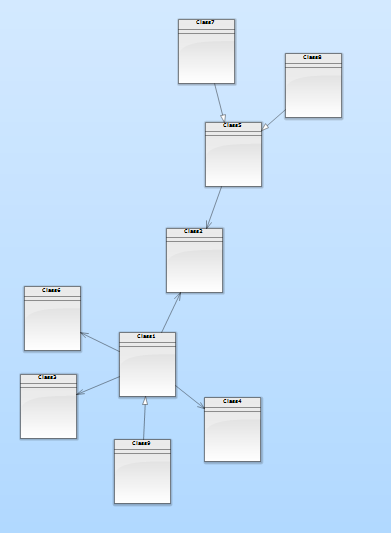
Auto Layout
Shows submenu with predefined automatic layouts, which can be applied to the whole active diagram or to the selection depending on the selection is empty or not.
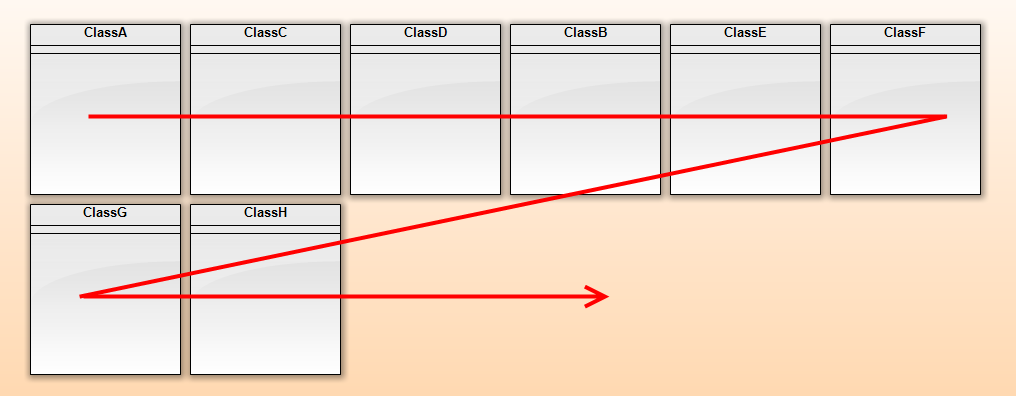
Auto Layout / Row Layout
Applies the row layout to the selected elements or to the whole active diagram, if the selection is empty. Elements are sequentially placed from left to right, from top to bottom so that the rows of elements are created.
Auto Layout / Column Layout
Applies the column layout to the selected elements or to the whole active diagram, if the selection is empty. Elements are sequentially placed from top to bottom, from left to right so that the columns of elements are created.
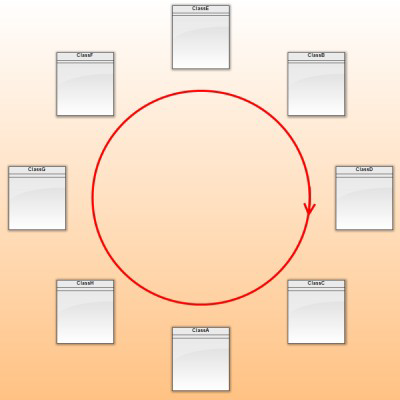
Auto Layout / Circle Layout
Applies the circle layout to the selected elements or to the whole active diagram, if the selection is empty. Elements are sequentially placed on the circumference of a circle.
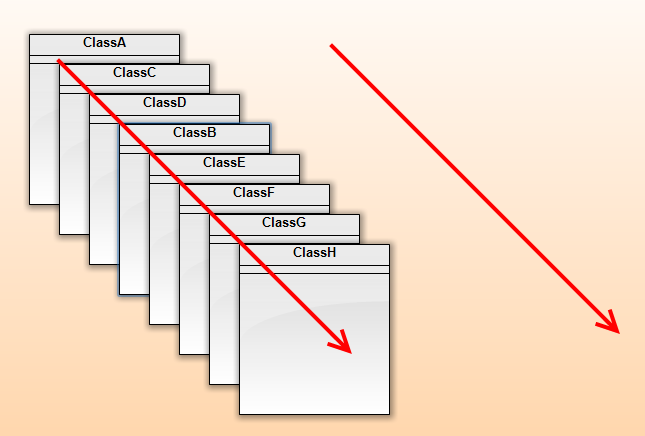
Auto Layout / Cascade Layout
Applies the cascade layout to the selected elements or to the whole active diagram, if the selection is empty. Elements are sequentially placed from top left to bottom right in parallel diagonals.
Auto Layout / Smart Layout
Applies the smart layout to the selected elements or to the whole active diagram, if the selection is empty. Program tries to arrange elements so that the associated elements are close to each other and there are as few intersections as possible.
Auto Layout / Force Directed Layout
Applies the force directed layout to the selected elements or to the whole active diagram, if the selection is empty.
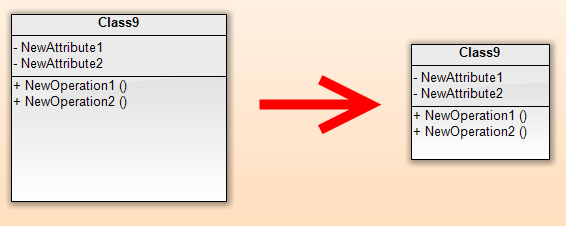
Auto Size
Sets the smallest possible size of the selected element(s), which is big enough to be all parts of the element visible.
Route Relation
Adjusts the path of the selected relation to not go through other elements.
Alignment
Shows the submenu with commands, which allows you to align the selected elements in different ways.
Alignment / Left
Aligns the selected elements to the left border of bounds specified by selected elements.
Alignment / Right
Aligns the selected elements to the right border of bounds specified by selected elements.
Alignment / Top
Aligns the selected elements to the top border of bounds specified by selected elements.
Alignment / Bottom
Aligns the selected elements to the bottom border of bounds specified by selected elements.
Alignment / Center Vertically
Aligns the selected elements to be centered to the vertical line, which is placed in the center of the selection.
Alignment / Center Horizontally
Aligns the selected elements to be centered to the horizontal line, which is placed in the center of the selection.
Make Same
Shows the submenu with commands, which allow you easily to set the same width, height or both for all selected elements.
Make Same / Width
Sets the same width for all selected elements by the first element.
Make Same / Height
Sets the same height for all selected elements by the first element.
Make Same / Both
Sets the same width and height for all selected elements by the first element.
Order
Shows the submenu with commands, which allows you to move the overlapped elements in the zorder.
Order / Bring To Front
Moves the selected element(s) to front of all elements in the current active diagram.
Order / Send To Back
Moves the selected element(s) to back of all elements in the current active diagram.
Order / Forward One
Moves the selected element(s) one step forward in the z-order.
Order / Back One
Moves the selected element(s) one step backward in the z-order.
Distribute
Shows the submenu with commands for distribution (change of relative position) of the selection element(s).
Distribute / Distribute...
Shows Distribute dialog with all options for element distibution.
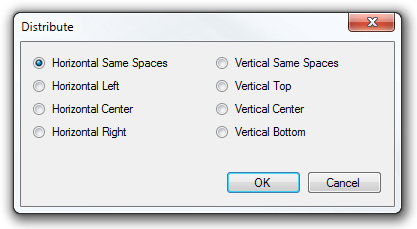
Distribute / Horizontal Same Spaces
Moves the elements to make the horizontal distance between each two elements in selection same.
Distribute / Horizontal Left
Divides the area on so many same vertical parts how many elements are selected and places (aligns horizontally) each element on the left edge of the neareast partial area.
Distribute / Horizontal Center
Divides the area on so many same vertical parts how many elements are selected and centers each element horizontally to the neareast partial area.
Distribute / Horizontal Right
Divides the area on so many same vertical parts how many elements are selected and places (aligns horizontally) each element on the right edge of the neareast partial area.
Distribute / Vertical Same Spaces
Moves the elements to make the vertical distance between each two elements in selection same.
Distribute / Vertical Top
Divides the area on so many same horizontal parts how many elements are selected and places (aligns vertically) each element on the top edge of the neareast partial area.
Distribute / Vertical Center
Divides the area on so many same horizontal parts how many elements are selected and centers each element vertically to the neareast partial area.
Distribute / Vertical Bottom
Divides the area on so many same horizontal parts how many elements are selected and places (aligns vertically) each element on the bottom edge of the neareast partial area.
Move
Shows the submenu with commands for exact moving of the selected element(s).
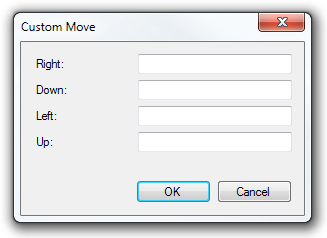
Move / Custom
Shows the Custom Move dialog, where you can set how you want to move the selected element(s). There are four fields:
- Right – moves the selected element(s) to the right by specified number of pixels.
- Down – moves the selected element(s) down by specified number of pixels.
- Left – moves the selected element(s) to the left by specified number of pixels.
- Up – moves the selected element(s) up by specified number of pixels.
Move / Left
Moves the selected element(s) to the left by 10 pixels.
Move / Right
Moves the selected element(s) to the right by 10 pixels.
Move / Down
Moves the selected element(s) down by 10 pixels.
Move / Up
Moves the selected element(s) up by 10 pixels.
Move / Start to (0,0)
Moves all elements of the active diagram to make the diagram bounds starting at 0, 0 coordinates.
Size
Shows the submenu with commands for adjusting the size.
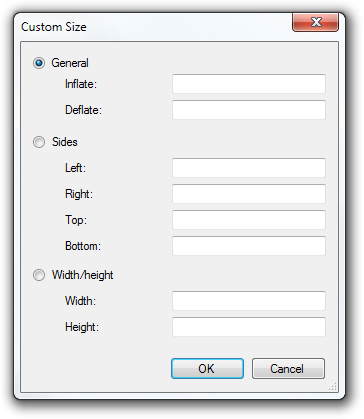
Size / Custom
Shows the Custom Size dialog, where you can set how you want to change the size of selected element(s).
Size / Inflate
Inflates the selected element(s) by 10 pixels. The width and height is increased by 10 pixels and the elements are moved so that the center remains in the same place.
Size / Deflate
Deflates the selected element(s) by 10 pixels. The width and height is decreased by 10 pixels and the elements are moved so that the center remains in the same place.
Size / Wider
Enlarges the width of the selected element(s) by 10 pixels. The elements are moved so that the center remains in the same place.
Size / Narrower
Reduces the width of the selected element(s) by 10 pixels. The elements are moved so that the center remains in the same place.
Size / Higher
Enlarges the height of the selected element(s) by 10 pixels. The elements are moved so that the center remains in the same place.
Size / Lower
Reduces the height of the selected element(s) by 10 pixels. The elements are moved so that the center remains in the same place.
Rotate
Shows the submenu with commands for rotating the element.
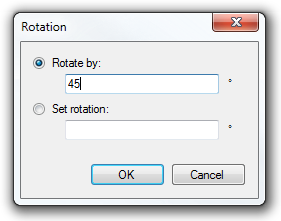
Rotate / Rotate...
Shows the dialog which allows to rotate an element by specified angle or to set an exact rotation.
Rotate / 45°
Rotates the selected element(s) by 45 degrees.
Rotate / 90°
Rotates the selected element(s) by 90 degrees.
Rotate / 135°
Rotates the selected element(s) by 135 degrees.
Rotate / 180°
Rotates the selected element(s) by 180 degrees.
Rotate / 225°
Rotates the selected element(s) by 225 degrees.
Rotate / 315°
Rotates the selected element(s) by 315 degrees.
Rotate / Reset Rotation
Resets rotation of the selected element(s) to the default unrotated state.
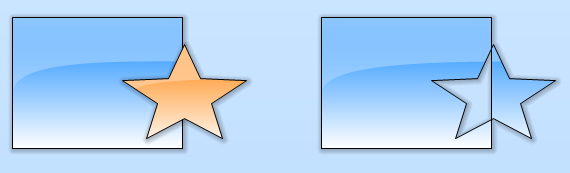
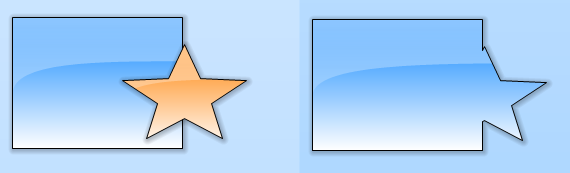
Shaping / Combine
Combines selected elements into single one using the XOR graphical operation. Nonoverlapping parts will be included in the new shape, overlapping parts will be excluded. Style of the first element will be used for the new result shape.
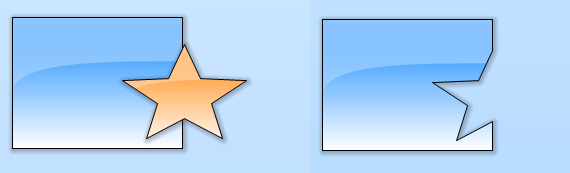
Shaping / Difference
The front selected element will be graphically subtracted from the behind selected element. The style of the clipped shape will be preserved.
Shaping / Intersection
Creates a new shape from a common overlapping part of selected shapes. Style of the first element will be used for the new result shape.

Shaping / Union
Unites selected elements into single one using the UNION graphical operation. Style of the first element will be used for the new result shape.
Lock Items
Locks/unlocks the selected element(s). Locked elements will be not able to move until you unlock them.
Group Items
Groups the selected elements into the single element.
Ungroup Items
Ungroups the selected group(s).
Other versions
- Version 9.x
- Version 8.x and lower
New Comment